
My Top 10 Literacy Engagement Tools
Disclosure: If you purchase any of the Amazon items linked in this post, I do earn a small commission as an affiliate, at no extra cost to you!
How many times have you heard someone say “drill and kill” to describe a phonics lesson? I often wonder if the folks saying this are actually teaching explicit and systematic phonics. Because if you are, and you are witnessing your students unlock the code and read and spell words, you will feel student engagement within your classroom.
Instead of “drill and kill”, when you teach explicit and systematic phonics, you will witness the “thrill of skill”. The more grapheme-phoneme correspondences (GPCs) students learn, the more words they will be able to read and spell. When I have the pleasure of witnessing this with my own students, it is a very special experience. There is joy, pride, and of course, engagement.
But sometimes it’s not always easy to engage our students. This can be especially true for students who have experienced trauma, or students who have fallen years behind due to a lack of instruction. These are our most vulnerable readers, and they know it. Getting these students unstuck can be tricky, but adding a little flair by using a few inexpensive tools can be just the push you need to get your students engaged.
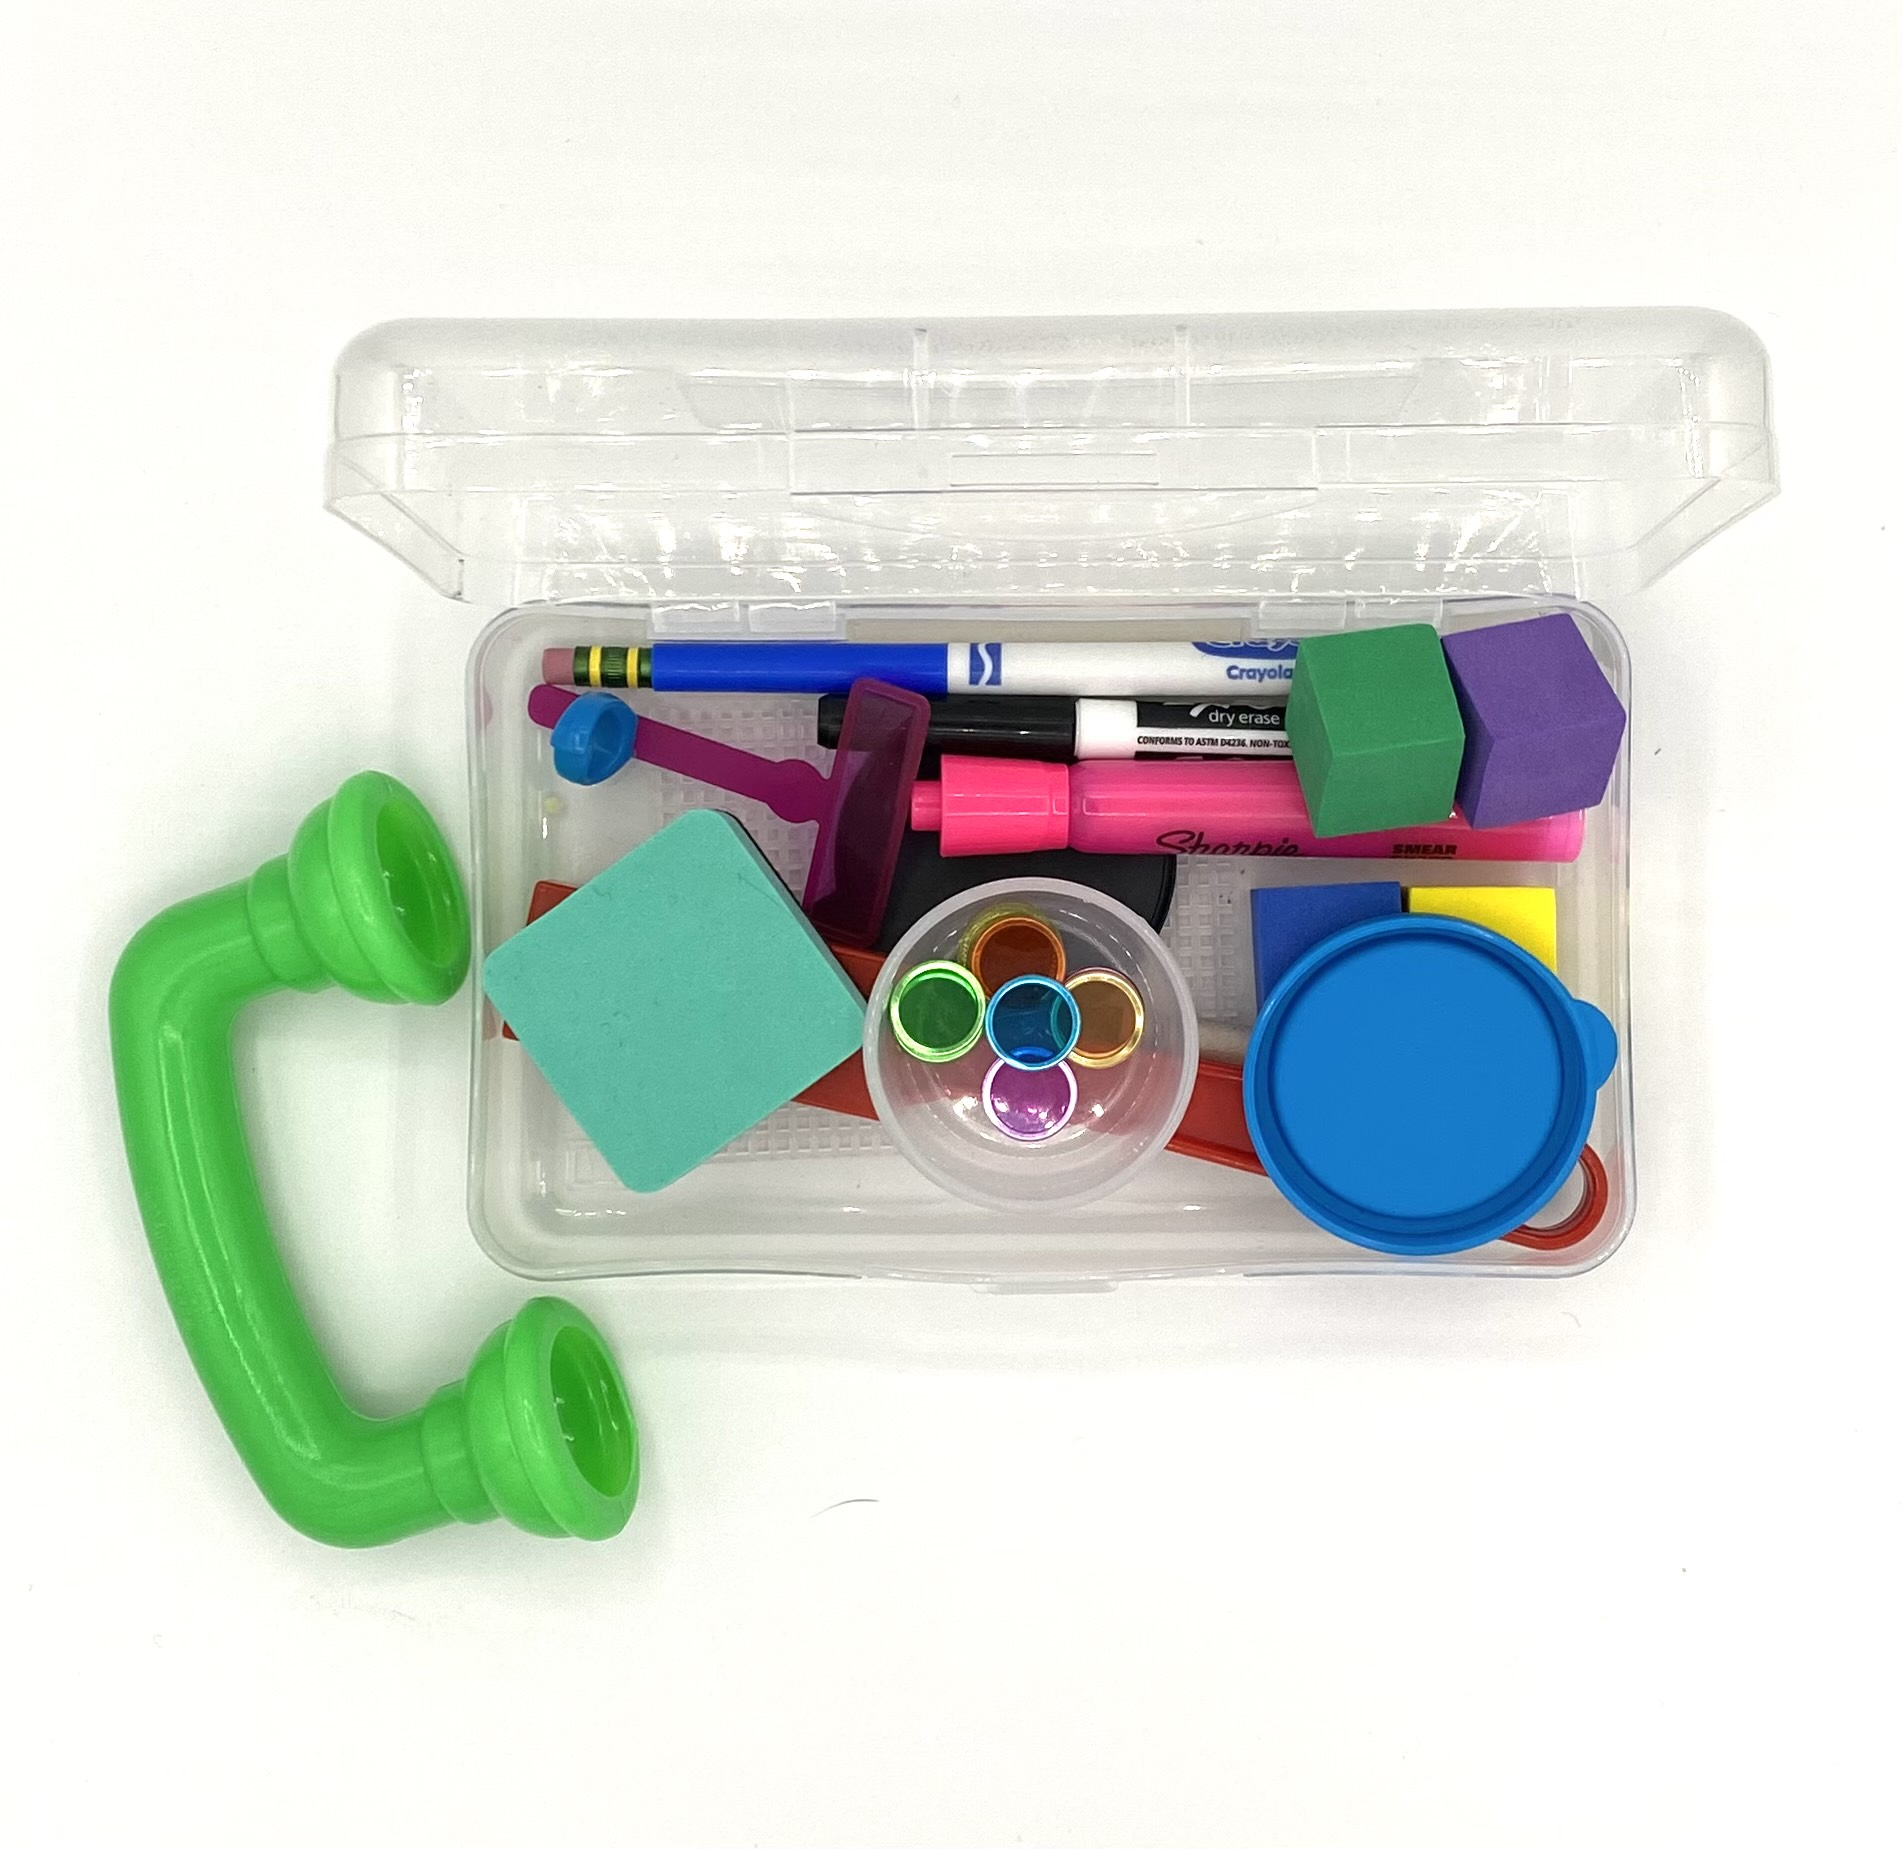
Today, I want to share my top ten favorite engagement tools. I’ll share the tool, why I love it, and how I use it. I keep most of these tools in the plastic pencil case pictured below for each student. When I started using these tools, some of my most reluctant readers were learning without even realizing they were learning!
Without further ado, here are my top 10:
1. Magnetic whiteboard with handwriting lines, dry erase markers, and erasers.
I know what you’re thinking. Duh. I already have these. However, do you know how many different ways you can use a whiteboard during literacy instruction? I use the two-sided magnetic whiteboards with handwriting lines pictured below, but if I had a whole classroom I would also purchase the ones with handles to promote opportunities for my students to respond during a lesson. For example, during spelling dictation, I could call out a word, ask students to write the word on their board, and then hold up their boards to show me the word. This allows me to check for understanding, and I can also differentiate if I need to, giving some students words with different skills if necessary.
I use whiteboards for:
Sound dictation
Writing the alphabet
Spelling
Phoneme-grapheme mapping with magnets
Sentence dictation
Word chains (read more about these here)
I prefer the magnetic boards because they are durable and can be used with magnetic chips or letters for phonemic awareness.

Color overlays as a tool for helping dyslexic students see the words better are a farce. They do not “help with” dyslexia in any way, as dyslexia is not a visual disability. However, I like to use these screens to help students track print and highlight words for reading. Not only do these screens keep my students on track, having something to touch and drag across the page offers a tactile component that many children love!

Similar to the colorful finger screens, transparent bingo chips are a fun addition during the reading portion of your phonics lesson. I like to have my students pick a color and use the chip to highlight the words they are reading in a list, sentence, or passage. You can also use chips for an auditory drill, as pictured below. This is where you say a sound, and the students cover the corresponding letter with a chip.

4. Magnetic Wands and Magnetic Bingo Chips
I use magnetic wands and magnetic bingo chips for:
Phonemic awareness
Phoneme-grapheme mapping
Spelling

I give my students a word, and ask them to give me the sounds in the word. As they give me the sounds I have them place a chip in or above a sound box. This is called segmenting sounds. To enhance this activity, ask students to spell the word you asked them to segment. They should write the matching graphemes for each sound, as shown above.
5. Foam blocks
Similar to the magnetic bingo chips, these can be used for having students segment sounds in words for spelling!

Magnetic letters are a beautiful thing especially for our youngest learners. I use these in a variety of ways, especially with pre-K and Kindergarten. In these early grade levels, teaching children alphabet knowledge- letter names, sounds, shape, and letter formation, is one of the strongest predictors of future reading outcomes. Using magnetic letters during a lesson helps students feel the shape of letters rather than just seeing the shape or writing the letter.
One of the primary ways I use magnetic letters during an alphabet knowledge lesson is by placing all the letters in a tray and asking my students to pull out the target letters. I will typically put a few of the target letter in the tray- both uppercase and lowercase. Finding the target letter within the context of other letters helps with solidifying alphabet knowledge because students are required to pay attention to the details in order to find the correct letter.
Another way I use magnetic letters is for word building and word chains. I also use magnetic letters for word building and word chains (although I prefer dry erase markers and whiteboards for word chains for ease of prep).
Word chains are a high impact routine that I rarely miss because it works on phonemic awareness and phonics simultaneously. They are fantastic for students who frequently confuse vowel sounds, skip over the second sounds in consonant blends, or any other single syllable spelling challenges.
You’ll want to have a list of 5-10 words containing the target phonics skill. Then:
T: Say “bug”.
S: “bug”
T: Say the sounds in “bug”
S: /b/ /u/ /g/
T: Spell bug with your letters.
T: Now I’m going to say another word, and you have to figure out which sound to change. Ready? Change “bug to big”.
If the student struggles, use the following scaffold:
Ask the student to touch each letter in “bug” but say the sounds in “big”. This helps them notice which sound is different.
Continue like this, asking the student to change the word to a new word.
These are most beneficial if they match the phonics skills you are teaching, or the skills students are struggling with. For example, if they struggle with consonant blends, practice 5-10 chains with consonant blends.
Mesh screens are a sensory experience for students forming and writing letters. I like to use these for pre-K and K for students to form letters with the index finger of their dominant hand. Then, you can place these under paper as students practice letter formation. Have them use a crayon for this practice. The texture of the screen gives students sensory feedback. I just cut them into smaller pieces to fit in students’ pencil boxes.

8. Boogie Boards and/or Rainbow Scratch Paper
Boogie boards and rainbow scratch paper are two other engagement tools for spelling and dictation. I don’t use these two all the time. I purposely keep them stored away for days when students are clearly needing some excitement to switch things up!
I use whisper phones with students during small group, when I ask students to all read their decodable text simultaneously. The beauty of the whisper phone is that it isolates the student’s voice so that they can hear themselves reading over the voices of the other kids. This is really important because the tendency during small group is to ask each student to read a portion of the decodable text. When we do this (round robin reading), each student is only practicing reading one sentence from the text versus the entire text. This is not enough practice in connected text.

Whisper phones allow all students to practice and respond, and this will have a direct impact on their reading outcomes. If something allows me to give my students more chances to respond and practice, take all my money I need to have it! One way you can make whisper phones vs buying them is PVC piping. I don’t have time for this, but some people do!
10. Compact Mirrors
I use compact mirrors for articulation practice. When I teach a new sound, I give students the mirror so that they can see what their lips, tongue, and teeth are doing when they produce the sound. These are especially helpful for students who mix up sounds. For example, if you have a student who says /f/ for /th/, showing them the difference in articulation can be really helpful.

Random things that didn’t make the list that I still need:
Writing Tools
My students always have the following writing tools in their pencil boxes:
A sharpened Ticonderoga Pencil (for tracking text, spelling, and writing)
A thin Crayola Marker (for circling target words)
A thick Highlighter (for highlighting target words in decodable texts)
A fine point Expo Marker

Dice
I use dice for roll and reads. If you’ve never heard of a roll and read, it’s a very simple concept that engages even the most reluctant of readers. Students roll a die, go to the corresponding number and read a word, and highlight the word after they read it. Students can do this independently or with a partner. If they work with a partner simply have them take turns rolling and highlighting the words they read with a different color. The first student to get five words in a row is the winner! If you need roll and reads, check out my phonics review packs here which contain roll and reads for every phonics skill.
Final Thoughts
I probably could list many more engagement tools, but these are my favorite 10 and then some that I can’t live without. Remember, you could probably teach a phonics lesson with just a whiteboard and a marker. However, sometimes our kids need a little sparkle to keep them going. What’s your favorite engagement tool? Comment below and let me know!